AWS Cognito
This section illustrates where the expected values are found within the Cognito dashboard. For a more detailed guide on enabling Cognito with OpenZiti, see below. Use these values to configure an external JWT signer. All of these values are found from the AWS Cognito dashboard for the corresponding User Pool screen or via the OpenID discovery endpoint located at:
Example Cognito OpenID Discovery Endpoint
https://cognito-idp.{region}.amazonaws.com/{userPoolId}/.well-known/openid-configuration
- By default, Cognito will only work with ID tokens. You'll likely need to change the ext-jwt-signer token type from Access to ID.
- Cognito's access token will not contain the user's email nor an audience. The audience field is mandatory as OpenZiti validates this claim within the JWT. This blog from AWS security illustrates how one can modify access tokens and add an audience.
| Field | Where to Find the Value in the Cognito UI | Example |
|---|---|---|
| Issuer | From the OpenID discovery endpoint, the issuer field | https://cognito-idp.us-east-2.amazonaws.com/us-east-2_6X1AbJGPY |
| Client ID | Shown on the Applications -> App clients overview page in the Client ID column | 5eac6vbnu75cems4pen2taggvr |
| Audience | Unless overridden, the same value as the Client ID | 5eac6vbnu75cems4pen2taggvr |
| External Auth URL | The same value as the Issuer | https://cognito-idp.us-east-2.amazonaws.com/us-east-2_6X1AbJGPY |
| JWKS Endpoint | Shown on the Overview page of the user pool as the as the Token signing key URL | https://cognito-idp.us-east-2.amazonaws.com/us-east-2_6X1AbJGPY/.well-known/jwks.json |
| Claims Property | Often email, but can also be sub or any other claim contained in the JWT | |
| Scopes | openid is always included. Often email but profile or any standard or custom scope | profile |
Create a User Pool
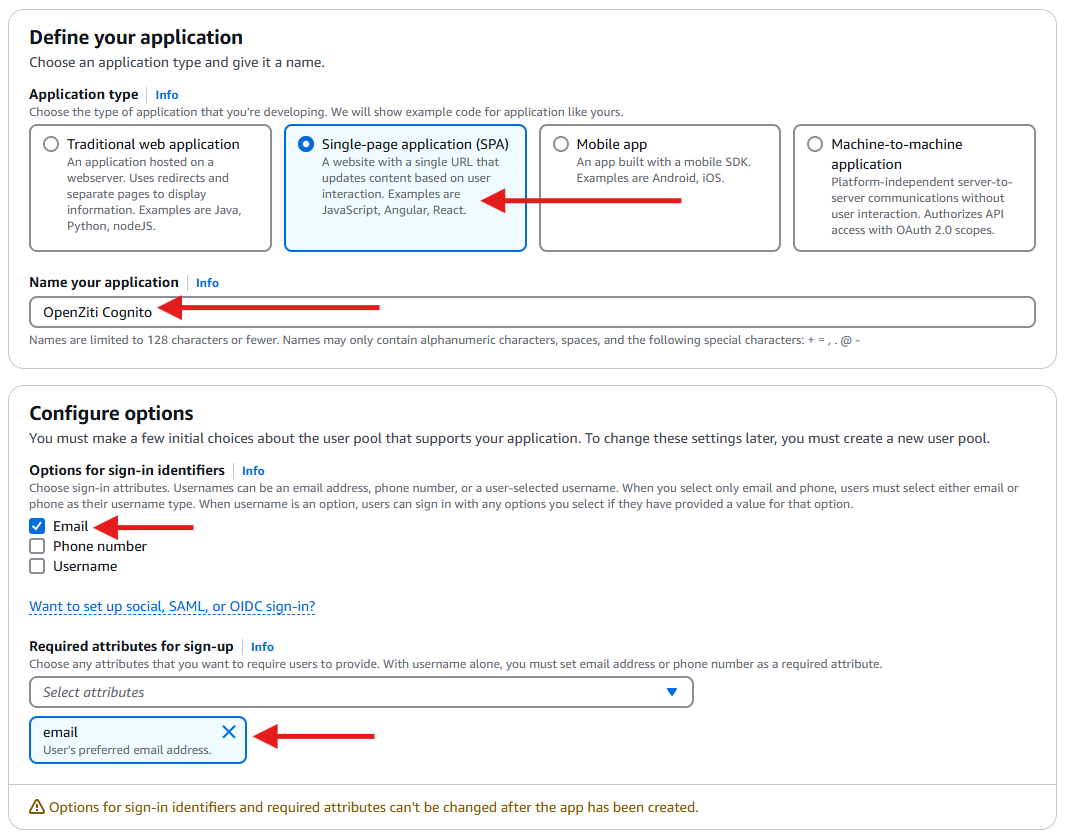
Begin by creating a User Pool within Cognito. When prompted, choose a Single-page application (SPA). Enter a name for the application and select email when configuring options. For required attributes for sign-up, also choose email.

Add Callback URL
Add the callback you want to enable and click Create user directory.
Callback URLs
The Authorization Code Flow with PKCE or PKCE flow requires configuring callback URLs the Identity Provider (IdP) will allow redirecting to. If the URL for a specific client is not specifically listed, the IdP will deny the authentication request. Depending on the technology used to authenticate to the OpenZiti Network, different URLs need to be specified. More than one URL is allowed to be configured. Decide if you are configuring the IdP for use with tunnelers, with BrowZer or with both and add the appropriate callback urls.
In the Auth0 dashboard, with the application selected, choose the "Settings" tab and scroll down to the "Application URIs" section and add the URLs.
For Tunnelers
Tunnelers require an allowed callback URL of: http://localhost:20314/auth/callback.
For BrowZer
The URL to configure for BrowZer will vary depending on the BrowZer configuration. BrowZer requires a wildcard certificate in order to be deployed and all services are delivered from this wildcard domain. You will need to add the configured wildcard domain as the callback url.
For Ziti Admin Console (ZAC)
The URL to configure an IdP for so that ZAC will be able to authenticate will depend on how you deploy your ZAC. The current method recommended to deploy ZAC will deploy it on the same URL as the controller. For example: https://controller.example.com/zac/callback

Edit Login Pages
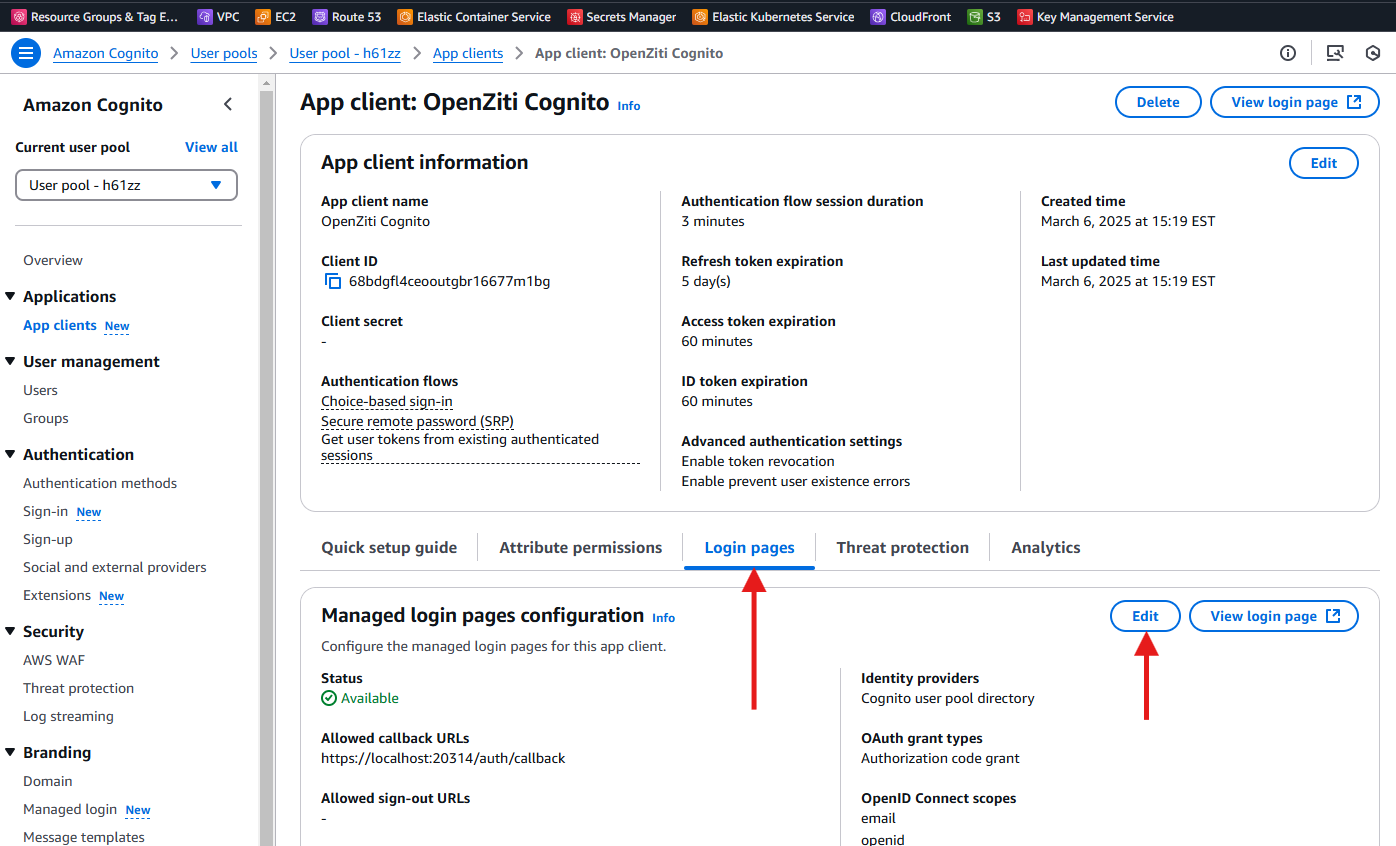
To enable BrowZer (or conversely, OpenZiti tunnelers), go back to the Cognito App client overview page. From there find the Login pages tab and choose Edit.

Add Additional Callback URL
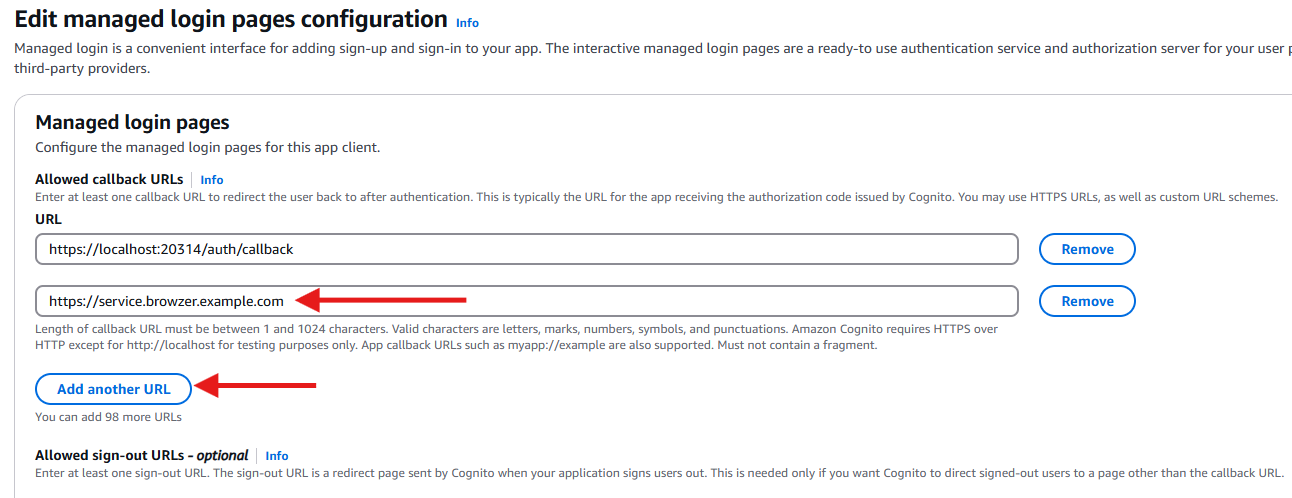
On the Edit page, first click Add another URL and then enter the second callback URL to allow.
