Authentik
This section illustrates where the expected values are found within the Authentik config. For a more detailed guide on enabling Authentik with OpenZiti, see below. Use these values to configure an external JWT signer. All of these values are found from the Authentik Admin interface in the corresponding provider's overview page.
| Field | Where to Find the Value in the Authentik UI | Example |
|---|---|---|
| Issuer | Shown on the right as the OpenID Configuration Issuer | https://authentik.doc.demo.openziti.org:9243/application/o/openziti-api/ |
| Client ID | Shown in the left column as the Client ID | authentik_openziti |
| Audience | Unless overridden, the same value as the Client ID | authentik_openziti |
| External Auth URL | The same value as the Issuer | https://authentik.doc.demo.openziti.org:9243/application/o/openziti-api/ |
| JWKS Endpoint | Shown on the right as the JWKS URL | https://authentik.doc.demo.openziti.org:9243/application/o/openziti-api/jwks/ |
| Claims Property | Often email, but can also be sub or any other claim contained in the JWT | |
| Scopes | openid is always included. Often 'email' but 'profile' or any standard or custom scope | email offline_access |
Create an Application with Provider
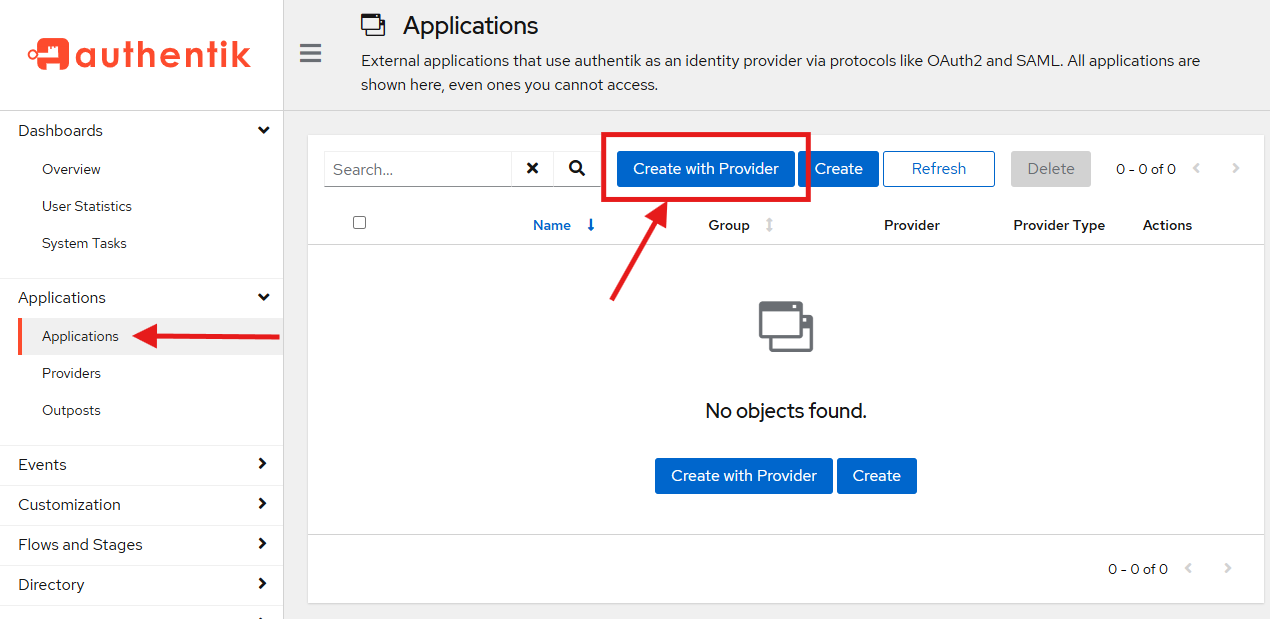
Begin by creating an application with provider. Go to the admin interface, on the left expand Applications, click on Applications and then click on Create with Provider and complete the wizard that pops up.

Configure the Application
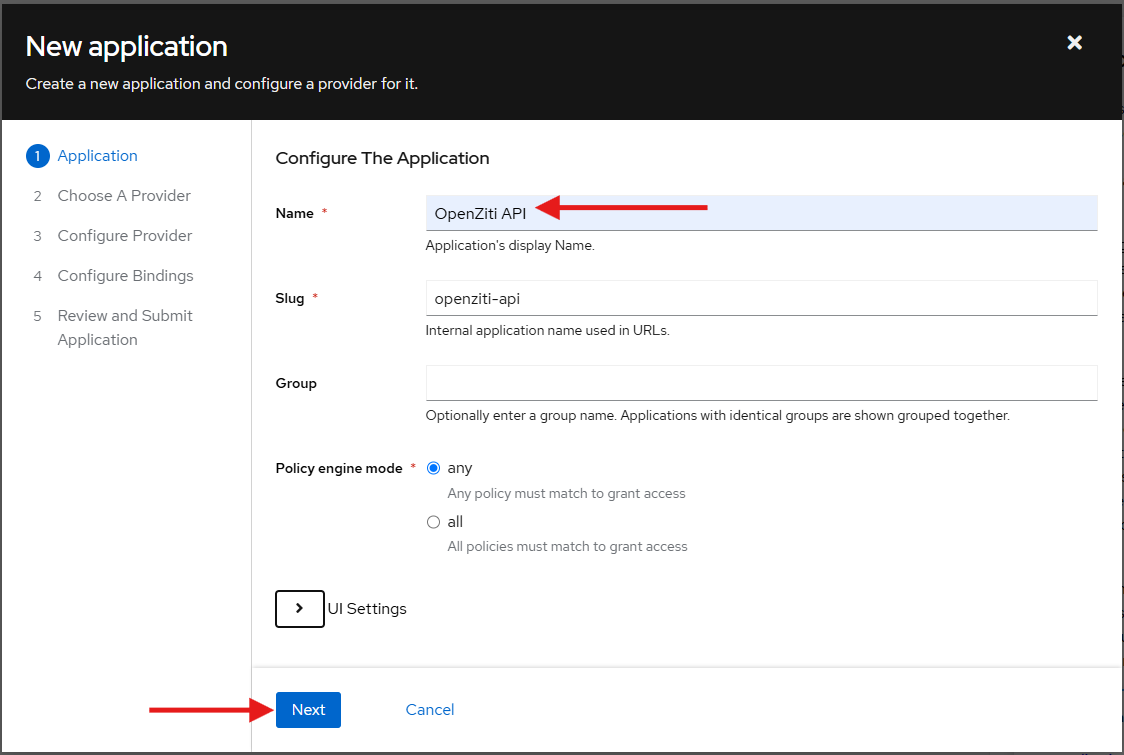
Enter the Name of the application and click the Next button.

Choose a Provider
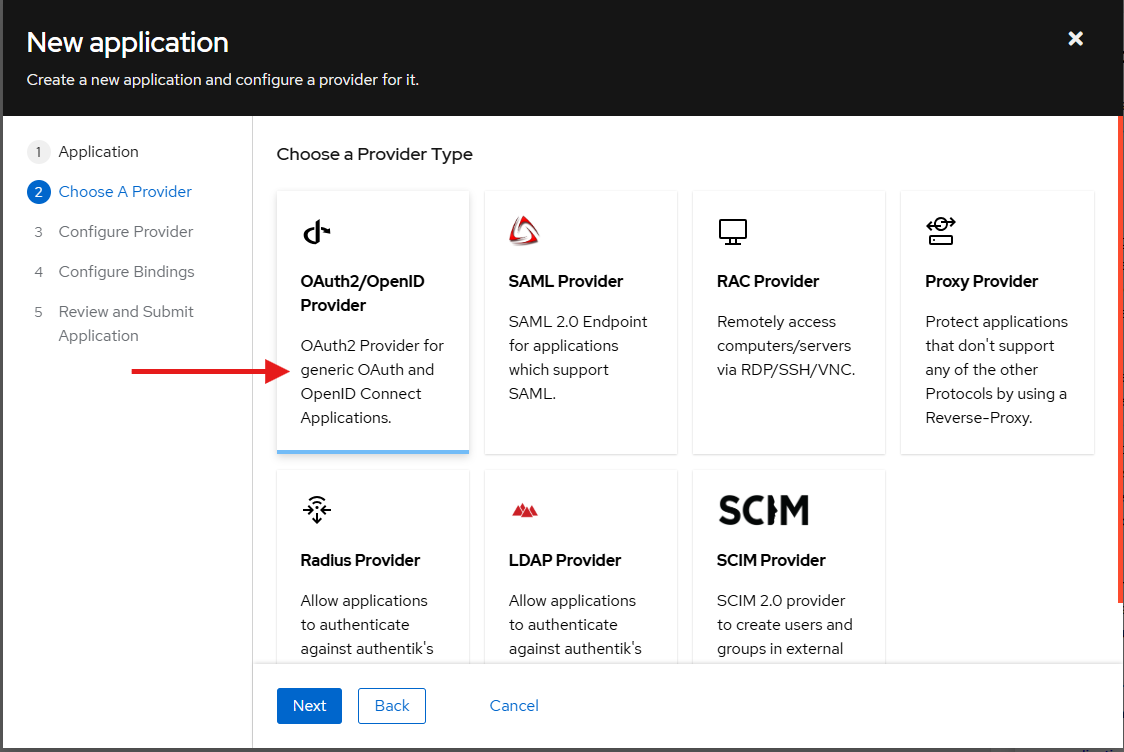
When choosing a provider, choose the OAuth2/OpenID Provider option and click the Next button.

Configure the Provider
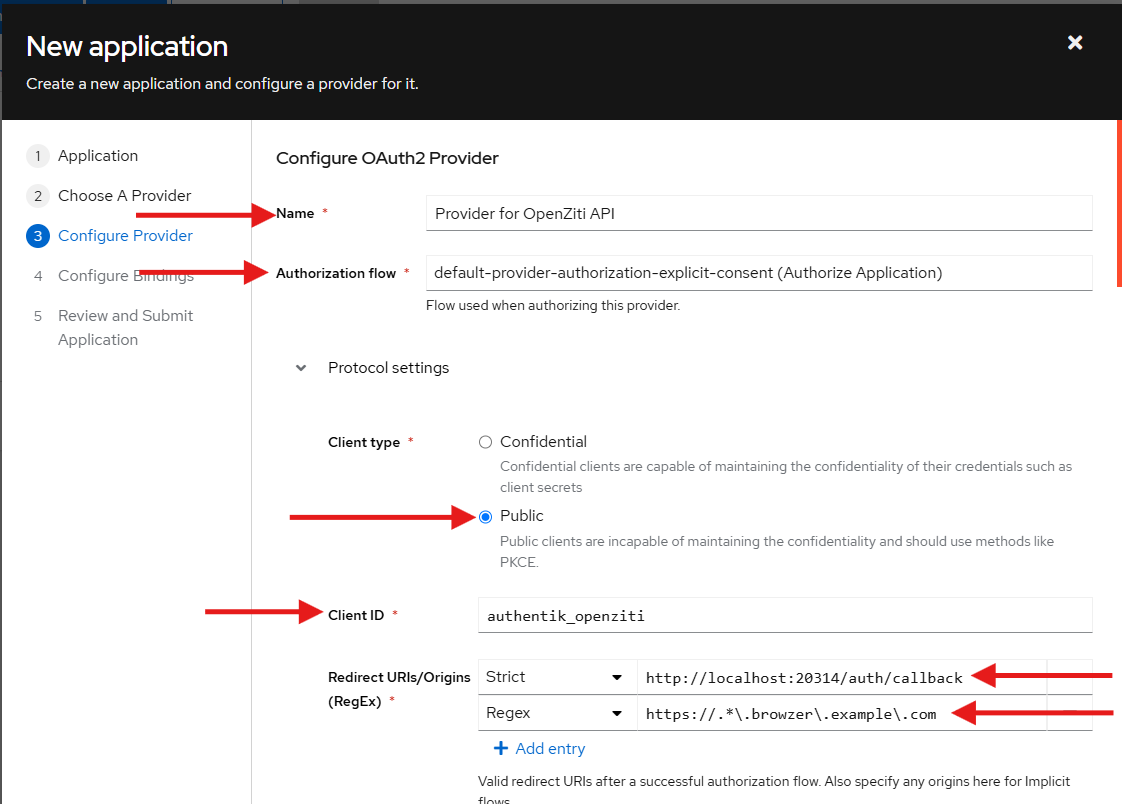
On the Configure Provider screen, enter a Name for the provider (or leave it as the default). When choosing the
authorization flow, select "default-provider-authorization-explicit-consent (Authorize Application)". The Client
type should be set to Public. Allow for the Client ID to be automatically generated, or assign a meaningful
name to the provider. Note that this will also become the audience used when configuring OpenZiti. Enter the expected
redirect URLs. OpenZiti tunnelers expect to have http://localhost:20314/auth/callback specified as a valid callback URL.
Callback URLs
The Authorization Code Flow with PKCE or PKCE flow requires configuring callback URLs the Identity Provider (IdP) will allow redirecting to. If the URL for a specific client is not specifically listed, the IdP will deny the authentication request. Depending on the technology used to authenticate to the OpenZiti Network, different URLs need to be specified. More than one URL is allowed to be configured. Decide if you are configuring the IdP for use with tunnelers, with BrowZer or with both and add the appropriate callback urls.
In the Auth0 dashboard, with the application selected, choose the "Settings" tab and scroll down to the "Application URIs" section and add the URLs.
For Tunnelers
Tunnelers require an allowed callback URL of: http://localhost:20314/auth/callback.
For BrowZer
The URL to configure for BrowZer will vary depending on the BrowZer configuration. BrowZer requires a wildcard certificate in order to be deployed and all services are delivered from this wildcard domain. You will need to add the configured wildcard domain as the callback url.
For Ziti Admin Console (ZAC)
The URL to configure an IdP for so that ZAC will be able to authenticate will depend on how you deploy your ZAC. The current method recommended to deploy ZAC will deploy it on the same URL as the controller. For example: https://controller.example.com/zac/callback
