Ziti Admin Console
The Ziti Administration Console (ZAC) is a web UI provided by the OpenZiti project which will allow you to configure and explore a network.
Overview
These steps enable the console for a quickstart controller. Run these commands with a shell like bash in a Windows Subsystem for Linux (WSL), macOS, or Linux.
Downloading From GitHub
With ZAC 3.0+, the ZAC has been transformed to a single-page-application (SPA) allowing you to download an artifact from GitHub and host the ZAC however you like. The controller was also modified to allow the ZAC to be hosted by the controller. These steps are applicable to both the Local - No Docker and the hosted yourself deployments. When complete, the controller will host the ZAC on the management API web binding.
-
On the controller host, download any console version >= 3.0.0 from GitHub.
wget https://github.com/openziti/ziti-console/releases/latest/download/ziti-console.zip -
Ensure
ZITI_HOMEis set to your quickstart working directory and exported to forked processes. You can always restore the quickstart environment variables by sourcing the environment file.source ${HOME}/.ziti/quickstart/$(hostname)/$(hostname).env
echo $ZITI_HOME -
Unzip the console in the controller's working directory.
unzip -d ${ZITI_HOME}/console ./ziti-console.zip -
In ${ZITI_HOME}/$(hostname -s).yaml, add a web API binding
zacin the list containingedge-management.- binding: zac
options:
location: ./console
indexFile: index.html -
Restart the controller service to apply the changes.
sudo systemctl restart ziti-controller.service -
Navigate to the console in your web browser using whatever port the management API is configured for. Depending on which quickstart you have used, the port may be different. The "Local" quickstart defaults to port 1280 while the "Host OpenZiti Anywhere" quickstart defaults to 8441 and is customizable by you. Make sure you are using the advertised host and port for your managment API, e.g.,
https://ctrl.ziti.example.com:1280/zac/
Using Docker
Copy PKI From Controller
It's a good idea to use TLS everywhere. To do this, you'll need to provide ZAC a key and a certificate.
If you have used the Local - With Docker quickstart to start
the network you can copy the certificates generated when the controller started.
Shown is an example which copies the certs from the OpenZiti container and uses them with ZAC. We'll copy the files
from the docker named volume myPersistentZitiFiles and put them into a folder at $HOME/.ziti/zac-pki.
mkdir -p $HOME/.ziti/zac-pki

docker run -it --rm --name temp \
  -v myPersistentZitiFiles:/persistent \
  -v $HOME/.ziti/zac-pki:/zac-pki busybox \
  cp /persistent/pki/ziti-edge-controller-intermediate/keys/ziti-edge-controller-server.key /zac-pki

docker run -it --rm --name temp \
  -v myPersistentZitiFiles:/persistent \
  -v $HOME/.ziti/zac-pki:/zac-pki busybox \
  cp /persistent/pki/ziti-edge-controller-intermediate/certs/ziti-edge-controller-server.chain.pem /zac-pki
Starting ZAC
With the certificates copied, you will be able to start the ZAC using one Docker command. Also notice the command will expose the ZAC http and https ports to your local computer so that you can access the ZAC from outside of Docker. If you customized any of these paths, you'll need to replace the paths specified accordingly (the '-v' lines).
docker run --rm \
       --name zac \
       -p 1408:1408 \
       -p 8443:8443 \
       -v "$HOME/.ziti/zac-pki/ziti-edge-controller-server.key":/usr/src/app/server.key \
       -v "$HOME/.ziti/zac-pki/ziti-edge-controller-server.chain.pem":/usr/src/app/server.chain.pem \
       openziti/zac
Do note that if you are exposing ports as shown above, you will need to ensure that ziti-edge-controller is
addressable by your machine in order to use Docker in this way. This guide does not go into how to do this in depth.
One easy, and common mechanism to do this would be to edit the 'hosts' file of your operating system. A quick
internet search should show you how to accomplish this.
Docker Compose
If you have followed the Local - Docker Compose quickstart you will have the ZAC running already. It's now included with both the default docker-compose file and the simplified-docker-compose file. Both compose files will start and expose the ZAC ports on 1408/8443.
Do note that if you are exposing ports as shown above, you will need to ensure that ziti-edge-controller is
addressable by your machine in order to use Docker in this way. This guide does not go into how to do this in depth.
One easy, and common mechanism to do this would be to edit the 'hosts' file of your operating system. A quick
internet search should show you how to accomplish this.
Kubernetes
Login and use ZAC
-
At this point you should be able to navigate to:
https://${ZITI_CTRL_EDGE_ADVERTISED_ADDRESS}:8443and see the ZAC login screen. (The TLS warnings your browser will show you are normal - it's because these steps use a self-signed certificate generated during the installation process)noteIf you are using docker-compose to start your network, when you access ZAC for the first time you will need to specify the url of the controller. Since everything is running in docker compose this url is relative to the internal docker compose network that is declared in the compose file. You would enter
https://ziti-edge-controller:1280as the controller's URL -
Set the controller as shown (use the correct URL):
-
Example using the "everything local" quickstart:
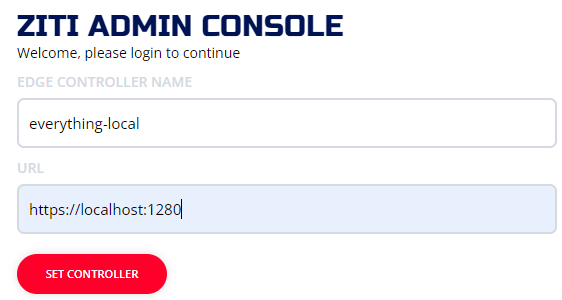
-
Example using the "docker-compose" quickstart:
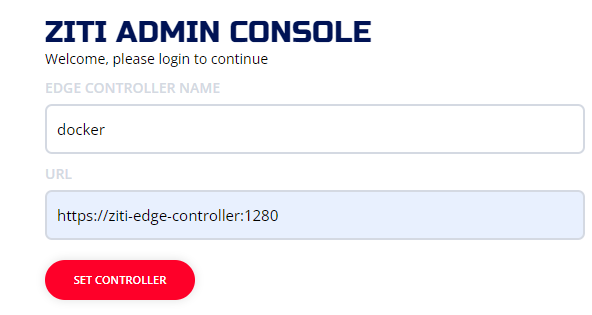
-
Example using AWS "host it anywhere":
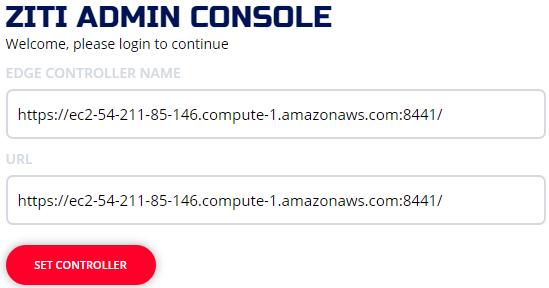
-
-
Optionally, change admin's password
As mentioned above, the ZAC will produce TLS warnings in the browser. It is encouraged to fix this. Valid certificates will promote confidence in the implementation. Let's Encrypt provides a free, automated way to obtain trusted certificates.
See The Console and Alternative Server Certificates for details on how to integrate.